There is one step in this pattern where you have to put the ruler down.
Not for cutting the squares, and not for the trimming. For one cut in the middle of the block, you lay the rotary cutter on a 5 1/2 inch square and slice it roughly in half along a line you did not measure. Then you turn the block and do it again the other way. One hundred and eight blocks, two hundred and sixteen cuts, and the pattern asks you to make every one of them a little different.
If that makes you uneasy, your instincts are working. Quilting rewards accuracy, and most of what we teach each other is about protecting it. So it is worth saying early what took me a while to see in this pattern: the freehand cut is not where the accuracy goes. It comes back two steps later, and it comes back with a ruler.
Kona Crossing is a free pattern from Robert Kaufman, designed, pieced and quilted by Jacey Gray, who blogged her sewing and knitting at Jacey Craft. It finishes at 45 by 60 inches, which is a generous lap quilt, and the whole top is crosses scattered over twelve blocks of solid color.
It is built entirely from wonky quilt blocks, 108 of them, and it is one of the clearest lessons I have seen in how to make them well. Each block takes two off-kilter cuts rather than one, and the two strips that go into those cuts are what draw the cross.
You can download the full pattern here: Kona Crossing quilt pattern PDF. The rest of this is what the four pages do not have room to explain.

How the wonky quilt blocks are made
Every block starts life as a plain 5 1/2 inch square of solid fabric. Nothing clever yet.
What turns it into one of the quilt's wonky quilt blocks is two cuts and two strips, with a trim after each one.
Cut it roughly in half horizontally, on a slightly diagonal line. Take a 6 inch by 1 1/2 inch strip in a contrasting color and sew it to the angled edge of one half. Press. Line up the edges of the original square, sew the second half to the other side of that strip, and press again.
Now comes the step that holds the pattern together. Before you do anything else, trim the block back to 5 1/2 inches square.
Then repeat the whole thing vertically. Cut the trimmed block roughly in half again, on another slightly diagonal line, insert a second strip in the same color as the first, press, and trim to 5 1/2 inches one last time. The two strips cross in the middle, and you have your block.
Jacey Gray asks for one thing while you work: vary the cutting line on each block, and cut and piece one color at a time. The variation is the design. If all 108 cuts landed in the same place the quilt would look like a grid of plus signs, which is a different quilt and a duller one.
Why the strips are 6 inches and not 5 1/2
This looks like a typo in the cutting list until you think about the shape of the cut.
A straight cut across a 5 1/2 inch square is 5 1/2 inches long. A diagonal one is longer, because it travels farther to get from one side to the other. The steeper your angle, the longer that edge becomes. The strip has to reach the whole way across it with something to spare, so the pattern gives you 6 inches and lets you trim the overhang off.
Which is also your permission slip. The extra half inch is how much wander the pattern has budgeted for. Tilt gently and you will have plenty. Slice corner to corner and you will run out of strip before you run out of seam.
Wonky quilt blocks still need an accurate trim
Two hundred and sixteen cuts made by eye, and the quilt still has to finish at exactly 45 by 60. The arithmetic is unforgiving once you follow it through.
A 5 1/2 inch block finishes at 5 inches. Nine of them make a 15 inch nine patch. Twelve nine patches in a three by four layout give you 45 by 60, with no sashing and no borders anywhere to absorb a mistake. Every block that leaves your cutting mat at 5 3/8 instead of 5 1/2 shows up in the seam that joins it to its neighbors.
So the trim is not tidying up. It is the step that makes the freehand cutting safe, and it happens twice per block, 216 times in all. This is the thing I would tell anyone starting their first set of wonky quilt blocks: the wonk lives inside the block, and the outside edges stay as square as anything else you have ever pieced.
For that volume of trimming you want a square ruler that matches the block, not a long one you have to reposition for every side. Our 6 inch square ruler sits over a 5 1/2 inch block with a quarter inch to spare on each edge, so you can see the whole block and all four lines at once and turn it rather than move the ruler. On a pattern that asks for this many identical trims, the time saved compounds in a way that is hard to believe until the third color.
The blade matters more here than usual too. You are cutting through a seam allowance on the second pass, and you are cutting without a ruler to push against, so a tired blade drags the fabric sideways and takes your angle with it. If yours has been on the cutter since the last quilt, this is a good project to start with a fresh one from our rotary cutter blades.
If precision cutting is the part you find hardest, we wrote a long piece on exactly that: how to cut fabric accurately, which goes through the blade, ruler and mat checks that fix most problems. It is worth reading before a pattern like this one rather than after. Deliberate wonkiness and accidental wonkiness look nothing alike in a finished quilt.
What the pattern asks for
Thirteen fabrics, all Kona cotton solids, and the division of labor between them is worth understanding before you shop.
Twelve of them are backgrounds, one per nine patch, and each one needs a 16 1/2 inch square cut into nine 5 1/2 inch squares. Fabrics B and C come from half yard cuts, fabrics D through M are fat quarters. The thirteenth, fabric A in Ice Peach, is three quarters of a yard and never becomes a background at all. Half of it is your binding and the rest is cut into insert strips.
You also need 1 1/2 yards for backing.
The strips are where the quilt gets its character. Each block uses two, both the same color, and the pattern tells you to use different colors from block to block for a scrappy look. Every fabric in the quilt contributes strips, so the crosses on any given background are drawn in the other eleven colors.
We do not carry Kona, and we do not have a line of solids that would stand in for thirteen brights, so this is a pattern we would send you elsewhere to buy fabric for. Our solids run to whites, blacks and neutrals rather than the melon and sour apple end of the range.
Where the cutting list and your fabric may disagree
The pattern's notes say width of fabric is at least 40 inches. The cutting list quietly assumes a little more, and it is better to know before you cut than after.
From fabric A you cut six 1 1/2 inch strips across the width and sub-cut them into 6 inch segments, and the pattern says you will have forty-two pieces. Forty-two requires seven segments from each strip, which needs 42 inches of usable width. At a true 40 inches you get six per strip, so thirty-six. The same thing happens with fabrics B and C, where the stated forty-eight becomes forty-seven.
Here is why none of that will spoil your day. The quilt needs 216 strips, which is 108 matching pairs. Even at the lower counts you end up with 232 strips and 116 pairs. There is margin built in, and the shortfall eats into the margin rather than into the quilt.
So if your count comes up short of the number printed on page three, you have not misread the pattern and you do not need more fabric. Measure your usable width, keep going, and check your pairs rather than your totals.
From 108 blocks to twelve nine patches
Once all nine blocks of one background color are made and trimmed, sew them together into a nine patch, three rows of three. Repeat eleven more times and join the twelve units in a three by four layout. Seam allowances are a quarter inch throughout and the pattern asks you to press them open, which is the right call here because of how many seams meet at each block corner.
Working one color at a time is not just tidiness. Nine blocks is a satisfying unit of progress, you keep the matching strip pairs straight, and you get to see each nine patch finished instead of staring at a pile of 108 loose blocks wondering what you have done.
If you would rather start with 5 inch squares
The method is not tied to the size. The quilter behind GourmetQuilter demonstrates the same idea in her tutorial making a cross-patch block from 5 inch squares, where the cuts are straight rather than angled and the block is built the same way, sewing a strip to the square with a scant quarter inch seam and chain piecing through the pile.
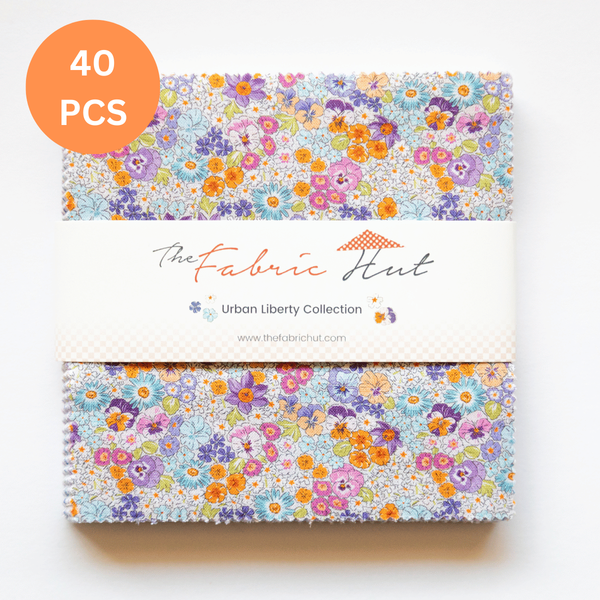
If you want to try the technique before committing to thirteen fat quarters, a charm pack is the low-stakes way in. Cut the 5 inch squares, insert your strips, trim back to 5 inches, and you have the same block at a slightly smaller finish. Our 5 inch precut squares come in enough colorways to find a set that behaves like solids, and a single pack is 42 squares, which is most of one nine patch with spares to practice the angle on.
For more of this kind of cutting, we keep a few other pieces on deliberately imperfect piecing, including improv quilting and the rules that still apply to it.
Is this really an intermediate pattern
Robert Kaufman grades it Experienced Intermediate, with the line "I know the ropes and would like to test my skills." That grading is fair, though not for the reason you might expect.
No individual step is difficult. There are no points to match, no curves, no set-in seams, no triangles. A confident beginner could sew any single block in this quilt.
What makes it intermediate is the repetition and the judgment. One hundred and eight blocks is a commitment, each one needs two cuts you have to make a decision about, and the trim has to be right every time with nothing downstream to hide a sloppy one. It tests consistency rather than technique, which is a harder thing to test and a more useful thing to have.
It is also why wonky quilt blocks suit a pattern this repetitive. One hundred and eight identical blocks would punish you for every wobble. These absorb the wobble and ask only that the edges come out true.

Before you start
Read the pattern through, as the first note asks. Cut and piece one color at a time. Trim after the horizontal strip as well as the vertical one, because skipping the first trim is the mistake that compounds. Press open. Vary your angle, but gently.
That short list is most of what separates wonky quilt blocks that look designed from wonky quilt blocks that look like an accident.
And put the ruler down for the cut that asks you to. Linda Clements writes in The Quilter's Bible that fabric does not have to be cut in rigid lines and patterns, and that free-form cutting without a ruler can create attractive and unusual designs. Her words for it are that freedom from the ruler can be very liberating. She is describing a different technique, but the permission transfers, and this pattern is a gentle place to accept it. The ruler comes straight back for the trim.
Happy quilting,
Marbelia
P.S. If you make Kona Crossing in something other than solids, I would love to see it. The pattern leans on flat color to let the crosses read clearly, and I keep wondering what it would look like in low volume prints where the crosses have to fight a little harder to be seen.