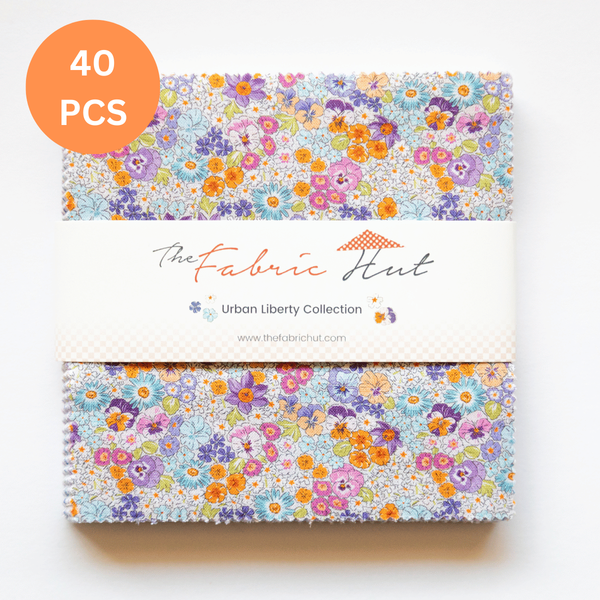
A common idea about a precut quilt kit is that every piece arrives already cut. That isn't always the case, and in a well made kit it shouldn't be. Half square triangles are the exception worth knowing about. In a good kit they arrive as squares: you pair them, sew them and cut them apart yourself, and depending on the method the pattern uses, one pair of squares gives you two, four or eight half square triangles. Triangles cut before they're sewn have their bias edge, the stretchy diagonal of the fabric, loose, and a pile of them is more work, not less, because every pair has to be lined up along two edges that stretch each time you handle them.
So before you buy, check how the kit handles its triangles. The product page or the pattern should tell you. If it doesn't, write to the shop and ask. And if the triangles come already cut as triangles, think twice about that kit.
One more thing before the details. A kit should sell you more than fabric. It should give you the confidence that you can finish this quilt at the level you're at today. That idea is the reason our kits are made the way they are, and there's more about it near the end of this guide.
Below you'll find what a precut kit is, what should be in the box, what a good kit gives you beyond the box, what's usually not included, how to read the skill level and the size, a checklist for choosing one, and how to take it from a sealed bag to a finished quilt.
What a precut quilt kit is
The word "precut", also written pre-cut or pre cut, gets used for two kinds of kit, and they're not the same thing.
A fully precut kit. The pieces of the quilt top have been cut for you to the size the pattern calls for. Squares, rectangles, strips and the binding, all cut and counted, with the half square triangles handled the way the first section describes. You open the bag and sew. This is what most quilters mean when they ask for a precut quilt kit.
A precut-friendly kit. Here the kit is built around standard precuts, the bundles fabric companies sell in fixed sizes. The Quilter's Bible lists the common ones: 5 inch squares (charm squares), 10 inch squares (layer cakes), and strips 2 1/2 inches wide by about 44 inches long (jelly rolls). These kits save you choosing fabrics, but some cutting is usually left to you, and backing and binding are often bought separately. Each of our free quilt patterns has the fabric for it put together in one product, and you'll find those in the same collection as the kits, under precut-friendly kits.
Neither is better in itself. If you like cutting, or you want to learn it, a precut-friendly kit gives you practice with the rotary cutter. If what you want is time at the sewing machine, a fully precut kit gives you that from the first evening. The thing to check, before you buy, is which one you're looking at. If the description says "includes fabric for the top" without saying "cut", assume there's cutting to do.
What's in the box: the basics, and what the better kits add
Every kit worth buying covers a few basics. The better ones add the things that decide whether you finish.

The basics every kit should have
The fabric for the top, cut. Grouped by size and fabric, with enough of each piece for the quilt in the photo.
A pattern. The instructions for putting it together, with diagrams.
The binding. Most kits include the binding fabric, and the better ones cut it into strips for you. The Quilter's Bible notes that many books and magazines suggest cutting double-fold binding 2 1/2 inches wide for a finished binding of about 3/8 inch, and that's the width you'll most often find in a kit, because it's also the width of most precut strips.
What the better kits add
Backing, cut to size. This is where kits differ most. A lot of kits include the top and the binding and leave the backing to you. When Lea Louise opened one of ours on camera, the backing was the thing she stopped on: she'd expected a full length she'd have to cut in half and piece herself, and it had already been cut.
Labeled bags. Each group of pieces in its own bag, with the cut size and the number of pieces on the label. In the Wild Reflections kit one bag reads 6.5 x 6.5 inches, 12 pieces, and another 6.5 x 9.5 inches, 4 pieces. Marc, from our team, held up one of those little packages on camera: two strips, one 1 1/2 inches and one 2 1/2 inches wide, labeled and numbered with how many you're supposed to have. The label is what lets you check the kit against the pattern in ten minutes instead of an hour.

Spare pieces. One of the quilters who sewed our Prairie Posies kit on camera found 25 of a piece the pattern asked for 24 of, and set the extra aside before she started, in case of a mistake. A seam that goes wrong, a piece caught by the iron, and you reach into the bag instead of waiting a week for fabric.
A pattern that's easy to follow. A quilt can look complicated and still be simple to sew, and the pattern decides which of the two you experience. Look for large diagrams, colored outlines that show which way each piece faces, and fabrics numbered so you can match a photo to a bag at a glance. Ours are printed on card stock, which matters more than it sounds once you've had a thin paper pattern tear under a ruler.
Packaging that keeps it together. Ours arrive as one sealed pack, with the pattern on the front and the backing wrapped around everything else, so nothing travels loose. Inside there's a zip bag for the pieces you're not using yet. Most quilts don't get finished in one sitting, and a kit spread across a dining table for a month is a kit that loses a piece.

Beyond the box
Fabric and a pattern get you started. What gets you to the binding is what comes with the kit after you open it.
Someone to ask, one on one
Most quilts that stall do it at one step, the one that didn't make sense the first time you read it. A kit with real support gives you a person to ask at that moment. With our Signature kits that's VIP support: you email, and if a step needs showing rather than explaining, Marc will get on a phone or video call with you.
Video tutorials for the techniques
Our patterns carry QR codes that take you to tutorial videos for each technique in the quilt, and to a page with any corrections, so if a printed pattern ever needs fixing you find out before you reach that step. Watching a seam being pressed is often quicker than reading about it.
A new technique in every kit
Every one of our kits teaches at least one technique. As Marc puts it, we build from one kit to another, adding skills along the way. So the second kit you make starts from what the first one taught you.
More pieces, if you need them
The spares in the bag cover most mistakes. If you need more than the kit has, write to us, and as long as we still make that kit we'll send the pieces free.
A guarantee you've read
Before you buy any kit, find out what the guarantee covers and for how long. A kit is a bigger purchase than a fat quarter, and the shop's answer tells you how much they expect the kit to work.
Our Signature kits carry a lifetime guarantee. If you change your mind, next week or five years from now, send the kit back complete, with all the pieces, and we refund it in full. The one condition is the one you'd expect: once you start sewing, those pieces become part of your quilt, and the kit can no longer be returned. So take your time deciding. There's no rush.
A cutting list, so you can make it again
Our patterns include the full cutting list, even though you won't need it for the kit. If you love the quilt, you can make it again from your own fabric, or from a collection you love. You'll be doing the cutting the second time, but you'll already know how the quilt goes together.
What's usually not included
Even a complete kit leaves a few things for you to choose.
Backing. In most kits it isn't there, so add its cost before you compare prices. A throw needs a backing a little bigger than the top on every side, and how much bigger depends on who quilts it. Our quilt backing guide works the yardage out for every common size. In ours, the backing is included and cut to size.
Thread. A good 50 weight cotton thread in a neutral color will piece almost any kit. If you're quilting it yourself you may want a second color for the quilting. We keep our quilting thread in one place, with filters for brand, type and color.
Batting. Kits leave it out, and that's deliberate. As Marc put it, the only thing you need to do is choose the batting that's best for where you live, or for how warm you want the quilt to be. The Quilter's Bible gives two rules of thumb worth keeping. Match the batting to the fabric, so cotton batting for a cotton quilt. And check how closely it has to be quilted: some battings need quilting every 2 inches, others are happy at 10 inches or so, and the package will tell you. Batting and backing need to be at least 2 inches larger than the top all around, to allow for the quilt drawing in as it's quilted. You'll find the batting we carry in its own collection.
Quilting. Either your own time at the machine, or a longarm quilter.
How to find a good longarm quilter
Sherri McConnell of A Quilting Life was asked how she'd find a new longarm quilter if hers all retired tomorrow. Her answer was word of mouth first, then social media, and one rule above the rest: see their work before you hand over a quilt that matters to you. Many longarm quilters keep a feed full of the quilts they've finished, and that feed is the portfolio.
A few things to settle before you book:
- Ask at your quilt shop and your guild. Sherri found the two quilters she's used for years through a class she'd taken with them.
- Look at quilts like yours. An allover design on a throw and dense custom work on a show quilt are different jobs.
- Ask how they price. Most charge by the square inch. Sherri's range runs from about a cent and a half a square inch to 10 cents for ultra custom work. A 60 by 72 inch throw is 4,320 square inches, so somewhere between about $65 and $432.
- Ask what size backing they need. 4 to 6 inches larger than the top on every side is common, which is more than many kits allow. Check before you book.
Skill levels, and how to read them
Kits are labeled with a skill level, and the label mostly comes down to two things: how many different shapes are in the pattern, and whether any of them are triangles.
Beginner
A beginner kit uses squares and rectangles, often only two sizes of them, sewn in rows. Our Modern Patchwork kit is exactly that: two shapes and six fabrics, 64 by 72 inches finished. The techniques it teaches are chain piecing, which is feeding pieces through the machine one after another without cutting the thread, and nesting seams, which is pressing seams in opposite directions so the corners lock together when you join the rows. Those two will carry you through every quilt you make after this one.

If this is your first quilt, start here. You'll finish it, and finishing the first one is what makes a second one happen.
Confident beginner
A confident beginner kit adds triangles, usually as half square triangles or flying geese, and sometimes a block with more pieces in it, like a star. The sewing isn't harder. What changes is the bias edge, and it rewards a little care when you press. Stars at Sea, one of our best-selling kits last year, is a confident beginner quilt: Marc describes it as right for someone who's got a little time on a sewing machine but hasn't made a lot of quilts.

If you've finished one quilt in squares and rectangles, you're ready for this. If you've never sewn a triangle, a confident beginner kit is still a reasonable first quilt, as long as you're patient with the pressing and the kit comes with videos for the triangles.
What the level doesn't tell you
The level says nothing about how long the quilt will take. A beginner kit in a large size can take longer than a confident beginner throw, simply because there are more seams. If time matters, for a gift or a deadline, look at the finished size and the number of blocks as well as the level.
Sizes: throw, queen, and the rest
Most kits come in a throw size, and that's where most of ours sit too, at around 60 by 72 inches. It's big enough for the couch or the foot of a bed, and small enough to quilt on a home sewing machine. Some designs come in a queen size as well, 84 by 96 inches, and a few of ours make the queen from two kits, so check the pattern before you buy if you're planning on the larger size. Table runner kits are the other common size, and a good way to try a technique before committing to a full quilt.
A quick way to picture a size: lay a measuring tape on your couch or your bed. Sixty by seventy-two covers a lot more of a couch than people expect, and a lot less of a queen bed.
How to choose a precut quilt kit: a checklist
Here's what we'd ask of any kit, ours included.
- Is the fabric good enough to hand down? 100% cotton, quilt shop quality, from a named fabric company. Cotton with a firm weave holds its size when you press it, and that's what keeps your blocks square. Our Signature kits are cut from Northcott and FIGO, Northcott's modern line, and our First Stitch kits from our own Fabric Hut cotton, chosen to the same standard.
- How are the half square triangles handled? As squares you sew and cut, or as loose triangles. If the page doesn't say, ask.
- Are the binding and the backing both included? Read the description for three words: top, binding, backing.
- Are there spare pieces, and can you get more if you need them?
- Does the pattern look easy to follow? Look for a photo of the instructions if the store shows one.
- Will it teach you something? A good kit names the technique you'll learn.
- Is it packed to be used over weeks, not one evening? Labeled bags and somewhere to keep the pieces you haven't used yet.
- What does the guarantee cover, and for how long?
- Is there someone to ask, one on one?
- Are there video tutorials for the techniques in the quilt?
- Can you make it again? A cutting list in the pattern means the quilt is yours, not just the kit.
- Is it the right level and the right size? Pick the level you're at now, or one step up if you want to learn something. Two steps up is where unfinished quilts come from. And measure where the quilt is going.
Most kits tick some of these. Very few tick all of them, and that's the list we hold our own kits to.
Precut kit, precut bundles, or yardage?
There are three ways to get the fabric for a quilt, and each one trades money for time differently.
Yardage. You choose every fabric, you cut every piece, and you end up with leftovers for your stash. It's the most freedom and the most time, and it asks you to get the yardage right before you start.
Precut bundles. A charm pack, a layer cake or a jelly roll gives you a coordinated collection in a standard size, and patterns written for them do some of the thinking for you. You'll still cut, and you'll usually buy background, borders, binding and backing separately. Our guide to measuring precuts before you sew them is worth reading if you go this way.
A fully precut kit. Someone else has chosen the fabrics, worked out the yardage, cut every piece and counted it. You pay for that work. What you get back is the hours you'd have spent at the cutting mat, plus the trips to the quilt shop and the evenings trying to find a backing that goes.
One of our customers, Beth, described that decision in her review of Stars at Sea. She'd looked at the kit several times and couldn't justify the price, until she realized everything had been done for her except the sewing: no hours cutting, no driving to quilt stores, no searching online for backing and binding.
Before you sew: opening the kit
Fifteen minutes here saves an evening later.
Clear a table and open everything at once. Lay the bags out with their labels facing up, next to the pattern. You'll start to see which bags belong to which block.
Check the counts against the pattern. You don't need to count every piece, but count the bags you'll use first. If anything doesn't match, it's far easier to sort out now than with half a quilt top sewn.
Measure a few pieces. Lay a ruler on one piece from each bag. Precuts are cut in stacks, and it's worth knowing your working size before the first seam. A thread off is normal. An eighth off, sew with that in mind.
Don't wash the pieces. The Quilter's Bible says small precut pieces shouldn't be washed before use, because they can distort. Our guide to washing a quilt for the first time explains how to wash it once it's finished.
Set the spares aside. Take the extra pieces out of each bag and keep them together in the zip bag. If you leave them mixed in, you'll sew them in and come up one short somewhere else.
Keep the labels on. Only open the bags you need for the step you're on. Two sizes that differ by an inch look almost the same once they're on the table.
Sewing a precut kit, start to finish
Every pattern has its own order, and you should follow it. But almost every precut kit goes through the same stages, and knowing them makes the pattern easier to read.
1. Set your seam allowance
Quilts are pieced with a quarter inch seam, and in a precut kit that quarter inch is the only measurement left that's up to you. Every piece was cut assuming it. If your seam is a little wide, every block comes out a little small, and by the time you join twenty of them the rows don't meet the borders.
The Quilter's Bible has a test that takes five minutes. Cut a strip 2 1/2 inches wide and cut three pieces 1 1/2 inches wide from it. Sew two of them together along the long side and press the seam to one side. Sew the third across the top. It should fit exactly. If it's too long, your seam was too wide, so move the needle to the right. If it's too short, your seam was too narrow, so move the needle to the left. A quarter inch foot, the one with a guide on the side, makes the seam much easier to hold. Our tutorial on getting a perfect quarter inch seam shows it on our own machine.
2. Sew the units
Most kits start with small units: two squares sewn together, a pair of rectangles, the squares that become half square triangles. This is where chain piecing earns its keep. Sew one pair, and without cutting the thread or lifting the presser foot, feed the next pair in behind it. Do the whole stack, then snip them apart. You save thread, you save time, and because you're sewing the same seam twenty times in a row, the twentieth is more accurate than the first.
The video below is one of our quilters sewing the Prairie Posies kit from the first seam, chain piecing and all. If you've never chain pieced, watch the first few minutes before you start.
3. Press, don't iron
The Quilter's Bible is clear on the distinction: pressing is not ironing. Open the piece and press the seam to one side, lifting the iron and putting it down rather than sweeping it across the fabric. Sliding it back and forth stretches the fabric, and with triangles it stretches the bias edge out of shape. Go easy with the steam on bias edges for the same reason. Your pattern will usually tell you which way to press each seam, and that matters for the next step.
4. Build the blocks and nest the seams
When two units with seams meet, the seams should lie in opposite directions. The Quilter's Bible describes how they then "nest" together, one ridge sitting against the other, so the corners line up almost by themselves. Put a pin right at the intersection and sew. This is what makes the points of a block meet, and it's why the pattern cares which way you pressed.
5. Join the blocks into rows, and the rows into a top
Lay out every block on the floor or a design wall before you sew the rows. Step back. This is your last easy chance to move a block. Then sew the blocks into rows, pressing the seams of alternate rows in opposite directions so they nest when the rows are joined. If the kit has borders, they go on last, and it's worth measuring the quilt through the middle before you cut them, not along the edge, which can stretch.

6. Make the quilt sandwich
Backing face down, batting on top, quilt top face up, everything smoothed flat. Pin the layers together with curved safety pins every few inches, so they can't shift while you quilt. If the backing comes in two pieces, it needs one long seam first, and the backing guide covers that seam.
7. Quilt it
Straight lines with a walking foot, which feeds the top and bottom layers through the machine at the same rate, are the friendliest place to start on a home machine. On a throw, lines that follow the seams, or run diagonally across the blocks, finish the quilt without any marking. Check your batting package for how far apart the lines can be.
8. Bind it
Join the binding strips end to end, press the long strip in half, and sew it to the front of the quilt. Then fold it to the back and stitch it down, by machine or by hand. The book's rule for length is to measure all four sides and add 8 to 10 inches for the corners and the join, and a kit has already done that sum for you. On the quilts she wants to last, Yvonne from our team sews the binding on by machine and then stitches it down on the back by hand.
Where kits go wrong, and how to stop it
These are the problems we hear about most, and almost none of them are about the cutting.
The rows don't meet the border
Nearly always the seam allowance. A seam that's a thread too wide loses that thread twice per seam, and across a row of ten blocks it adds up to a real shortfall. Do the three-strip test from step 1 before you start, and if you're already halfway through, measure one finished block against the size in the pattern. If it's small, adjust your needle for the rest, and ease the rows together with pins rather than trimming.
A piece seems to be missing
Check the spares and the pieces you've already sewn first. The most common cause is a piece of one size sewn where the other size should have gone, especially when two cuts differ by an inch, like 6 1/2 by 6 1/2 and 6 1/2 by 9 1/2. Lay the unit against the diagram. If a piece really is missing, use a spare, and if there isn't one, ask the shop for it.
The points don't meet
Usually pressing. If two seams were pressed the same way, they can't nest, and the intersection drifts. Re-press one of the units in the other direction, pin at the seam, and sew again.
The quilt top waves at the edges
Borders cut to the length of the edge rather than the middle, or bias edges stretched during pressing. Measure through the center, cut the borders to that length, and pin them on evenly. Press with an up and down motion, never a slide.
The backing is too small for the longarm quilter
A kit's backing is cut for the quilt, usually a few inches bigger than the top. Many longarm quilters want 4 inches or more on every side. If you're sending the quilt out, measure the backing against what the quilter asks for before you book, and if it's short, ask them what they'd suggest.
The kit goes back in the closet
The most common way a kit goes wrong is that it never gets started, or it stops at the first step that feels unclear. That's what the videos and the support are for. If you're stuck, ask. A two minute answer is better than a quilt top in a drawer.
Kits for retreats, teaching and gifts
Quilt retreats. One use Marc suggests for a kit is easy to overlook: packing it for a retreat. You don't need a cutting mat, a stack of rulers and a bag of fabric you haven't cut yet. You bring the kit, your machine and an iron, and you sew from the moment you sit down. Open it at home first and do the checks above. A missing piece is a five minute problem at your own table and a whole afternoon's problem in a hotel ballroom.
Teaching someone to quilt. A beginner kit lets you teach the two things that matter, the seam and the pressing, without spending the first lesson on rotary cutter safety. Marc calls quilting a family affair, especially as we teach the younger generation how to quilt, and a kit is a good way to get someone new started.
As a gift. A kit is one of the few gifts a quilter can open and start on the same day. Choose their level, or one step below it if you're not sure, because a gift should be a pleasure and not a test. A throw is the safest size, because everybody has a couch. And if the quilt you're making is for someone else, a wedding or a new baby, count back from the date: the weekends the pattern needs, plus time for the quilting, plus a week for the binding, which always takes longer than you planned.
Why our kits are made the way they are
When you buy a precut quilt kit, the fabric is the smallest part of what you're buying. What you're really buying is the confidence that you can make that quilt, at the level you're at today.
The biggest thing that stops a quilter, beginner or not, is the fear of not being able to do it. It's why kits sit in closets, why tops wait years for a border, and why so many people stay on the quilts they already know. A good kit should take that fear away while it teaches you the techniques for your level, so you finish this quilt and start the next one knowing more than you did.
That idea is where our kits started. It's why every one of them teaches at least one technique. It's why the half square triangles arrive as squares, the backing and the binding are in the box, there are spare pieces in the bags and more if you run short, every technique has a video, and our Signature kits come with someone you can email, call, or see on a video call when a step doesn't make sense, and a lifetime guarantee for as long as the kit is still complete. None of these is a feature for its own sake. Each one removes a reason not to finish.
Precut quilt kit questions we are asked most
Are precut quilt kits good for beginners?
Yes, and in some ways they're the best start there is. Cutting is the step where most beginners lose accuracy, and a precut kit takes most of it out of the first quilt. You get to concentrate on the quarter inch seam and on pressing, the two skills that decide how a quilt turns out. Choose a kit labeled beginner, in squares and rectangles, in a throw size or smaller. Our Modern Patchwork and Floral Patchwork kits were written for exactly this.
Do I need a rotary cutter if the kit is precut?
You'll want one. If the quilt has half square triangles, they're cut apart after you sew them, and you'll square up the quilt before binding either way. A rotary cutter, a small ruler and a mat make both easy.
Is batting included in a precut quilt kit?
Almost never, including in ours. Batting is personal: some quilters want a flat cotton quilt for summer, others want something warmer with more loft, and it's bulky to ship. Choose it once you know how you're going to quilt, and buy it at least 2 inches bigger than the top on every side, or larger if a longarm quilter is doing the quilting.
Is backing included?
In many kits it isn't, so read the description. In ours it is, cut to size for the quilt, together with the binding.
Should I wash the precut pieces before I sew?
No. Small precut pieces can fray and distort in the wash. Use them as they come, and wash the quilt once it's finished, gently and in cold water.
How long does a precut quilt kit take to make?
It depends on the size and the pattern far more than on the level. A throw in squares and rectangles can become a quilt top over a couple of weekends. A queen, or a quilt with stars and triangles, takes longer. Without most of the cutting, nearly all your time goes to the machine, which is the part most of us came for.
Can I make a queen size quilt from a throw kit?
Not from one kit, because the fabric is cut for the throw. Some of our designs are sold in a queen size, and a few make the queen from two kits. The product page and the pattern tell you which.
What if I make a mistake?
Use one of the extra pieces. That's what they're for. If a seam has to come out, take it out gently with a seam ripper and press the piece flat before you sew it again. Cotton forgives a lot.
Are precut quilt kits worth the price?
That depends on what your time is worth to you, and on what's in the box. Compare a kit to buying the same fabrics by the yard plus the backing and binding, and the kit usually costs more. Compare it to the hours of cutting, the quilt shop visits and the leftover fabric you didn't need, and many quilters decide it's the better deal. Some of our customers say exactly that in their reviews. The thing to avoid is comparing a kit that includes backing, spares and support with one that doesn't.
What to have ready
- A sewing machine with a quarter inch foot, cleaned and with a new needle
- 50 weight cotton thread in a neutral color
- Pins, ideally fine flat-head quilting pins
- An iron and an ironing board or pressing mat
- A seam ripper, because everybody uses one
- A small rotary cutter, ruler and mat for the half square triangles and for squaring up
- Batting, at least 2 inches bigger than the quilt top on every side
- A clear table and fifteen minutes for opening and checking the kit
Where to start
If this is your first quilt, choose a beginner kit in squares and rectangles, do the quarter inch test before you sew anything, and give yourself an evening just to open the kit and lay it out. If you've made a quilt or two, a confident beginner kit with stars or triangles is the natural next step, and it'll teach you to press with care.
Our precut quilt kits are cut from quilt shop cotton, with the binding and the backing included, a few extra pieces in every box, and someone to ask when you need it. Find the one that fits the room it's going to, and the next thing you do is sew.